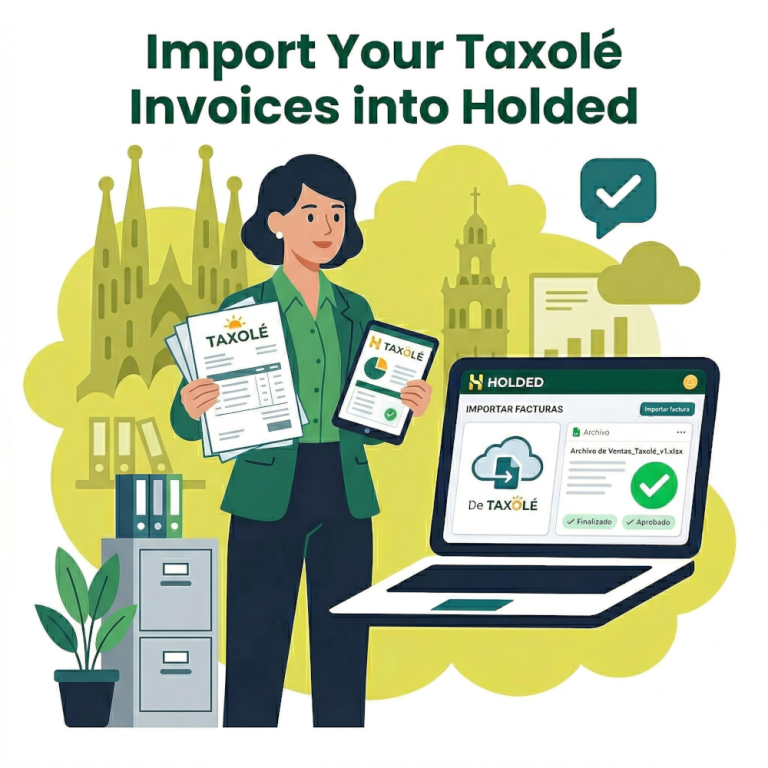
Keeping your accounting up to date and error-free is essential for the health of your business. If you use Taxolé as your billing software and manage your accounting in Holded, syncing your information is a quick process if you follow the right steps.
Below is a detailed guide to importing your invoices, credit notes, and tickets generated in Taxolé directly into your Holded account, avoiding common errors and duplications with the Tax Agency (AEAT).
1. Access the Import Area in Holded
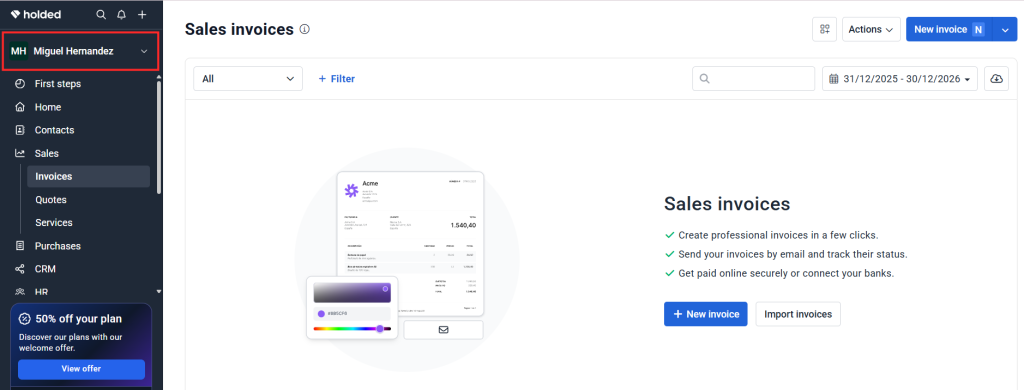
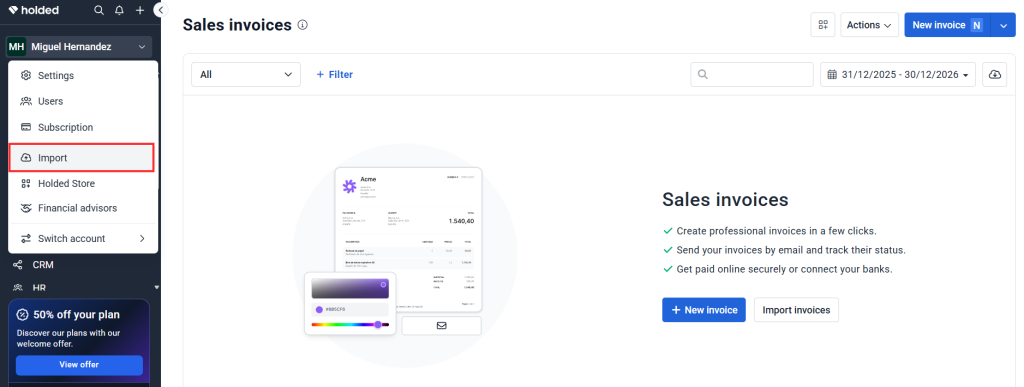
The first step is to log into your Holded account and go to the section where the data synchronization magic happens.
- Log into your account through this link: app.holded.com/home
- Once inside the platform, go to the sidebar menu and click on your username.
- A menu of options will drop down; click on “Import”.
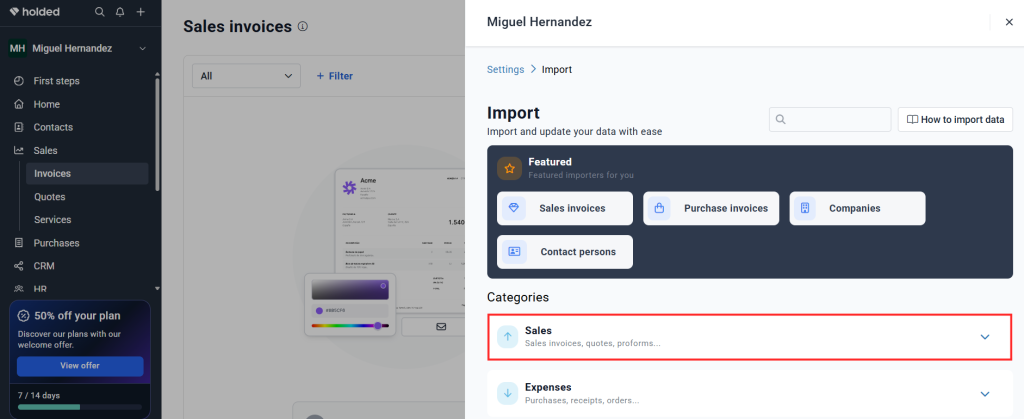
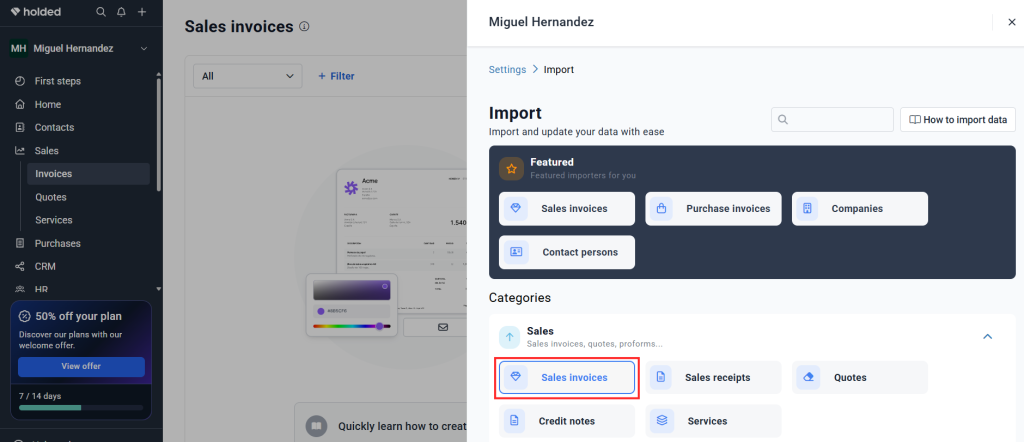
2. Locate the Correct Category (Sales)
Upon entering the imports section, Holded will show you all the data categories you can upload to the system. For this case, we will work with commercial documents.
- Find and expand the “Sales” section.
- Inside this section, you will find the options compatible with the files Taxolé generates:
- Sales Invoices
- Sales Tickets
- Credit Notes (facturas rectificativas)
⚠️ Very important note: It is mandatory to upload your file in its corresponding space. If you upload a tickets file in the invoices section, the system will generate import errors.
Exception: It is better to register credit tickets (tickets rectificativos) manually in Holded, as our Taxolé platform does not generate an automatic file for this specific category.
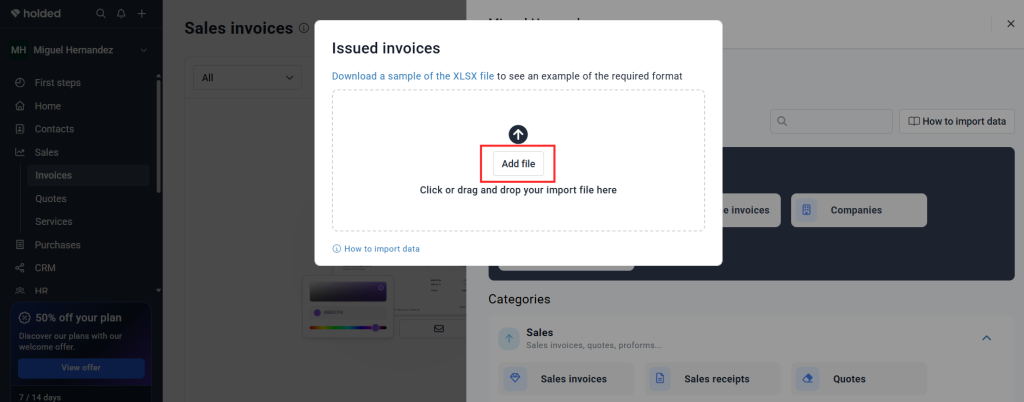
3. Upload and Validate Your Taxolé File
Once you have identified and clicked on the type of document you want to upload (e.g., Sales Invoices), it’s time to upload the information.
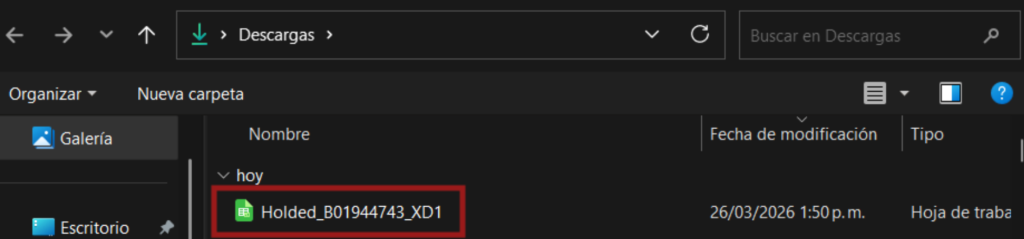
- Click on the option to select the file and choose the
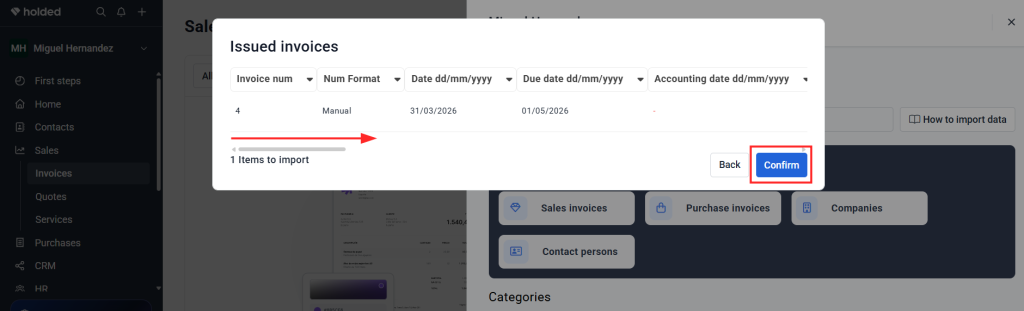
.xlsxdocument you previously exported from Taxolé. - Holded will show you a preview of the information you are about to upload. You can verify the data by moving the arrow to the right.
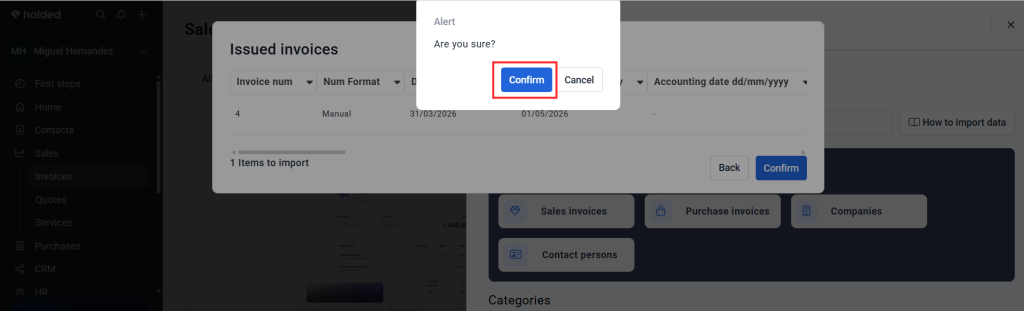
- If everything looks good, click “Confirm” after the validation.
- The system will ask for a second security confirmation. Accept it to continue.
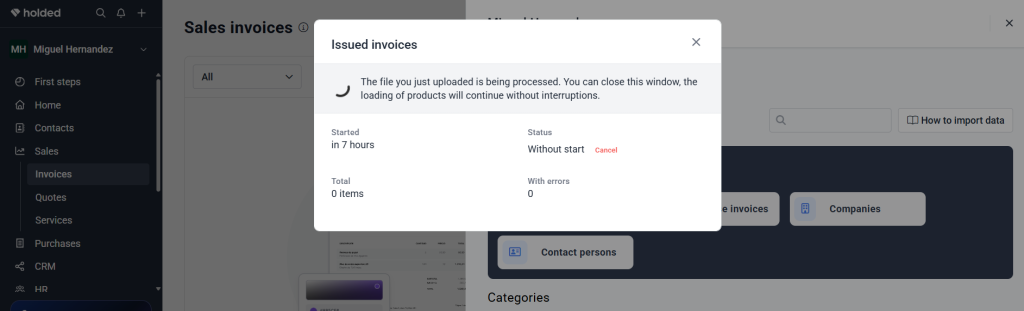
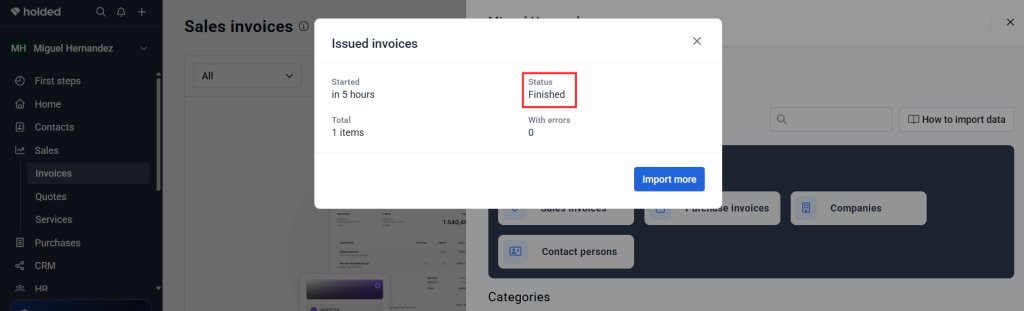
The system will start loading the data. Wait a few seconds until Holded processes the information and displays the “Finished” status message. Once you see it, refresh the page to check that everything has been imported correctly.
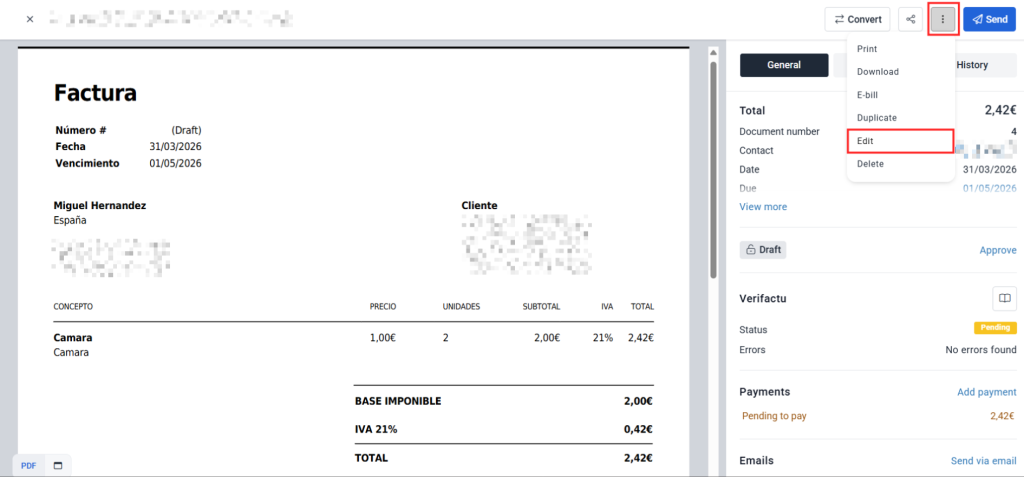
4. Review and Edit Your Documents
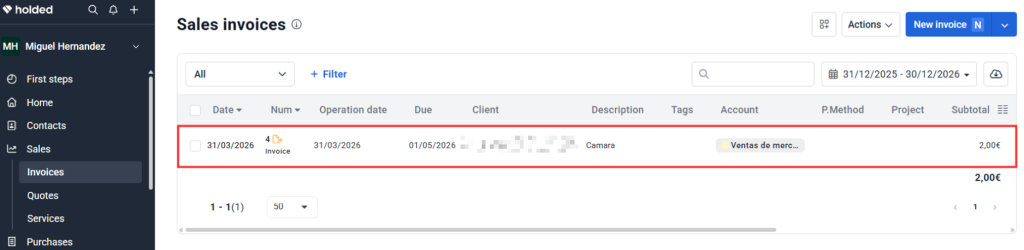
For security, all invoices, credit notes, or tickets you import will initially be uploaded in “Draft” (Borrador) status.
It is your duty to review these documents before making them official. You must check that nothing is incorrect or that no data is missing to be filled out.
- Find the imported invoice in your Holded list.
- Click on it to open it and select the “Edit” option.
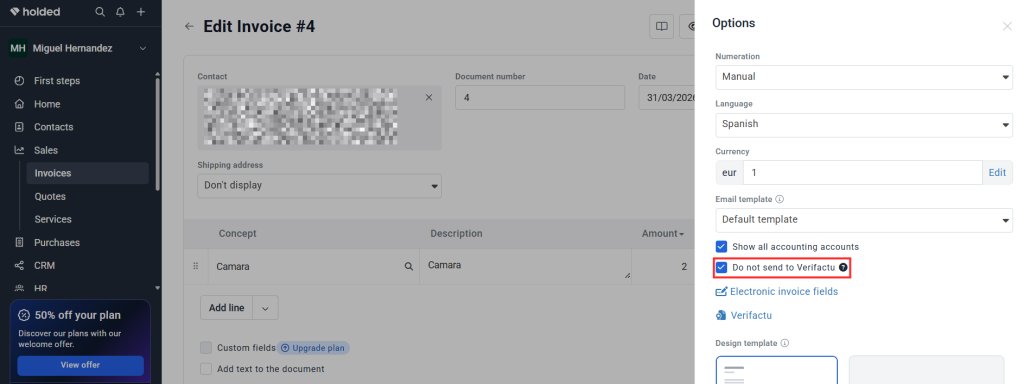
5. Avoid Duplicates in Verifactu (AEAT)
If you have your Holded account configured in Verifactu mode, this step is absolutely essential to avoid tax issues.
Since in Taxolé we can already have the account active in Verifactu mode and we take care of sending the data directly to the AEAT (Spanish Tax Agency), you must not allow Holded to send this data a second time. A double registration would cause serious errors in your accounting with the Tax Authority.
How to avoid it?
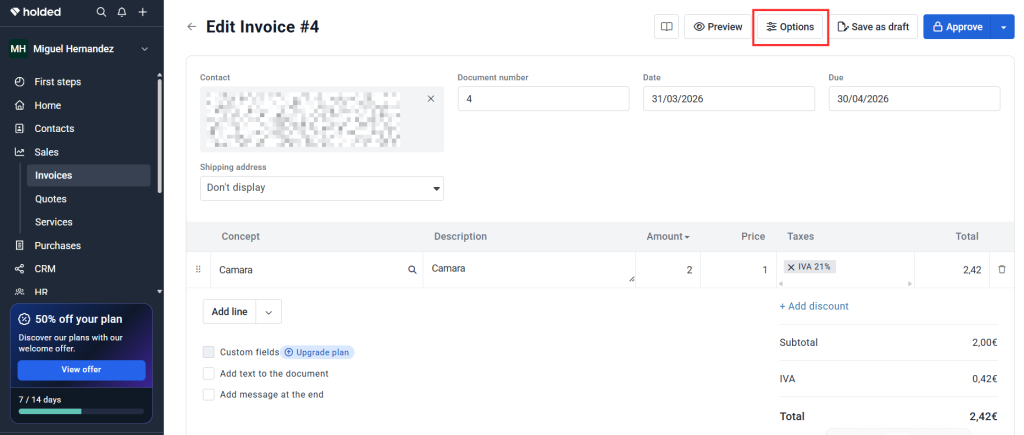
- Once you are inside the “Edit” screen of the invoice, look for the “Options” button located at the top.
- When this menu drops down, find and manually check the box that says: “Do not send to Verifactu”.
6. Final Approval
Finally, once you have verified that all amounts, clients, and data are correct, and (if applicable) you have checked the box to not send to Verifactu, you only have one step left.
- Click “Approve”.
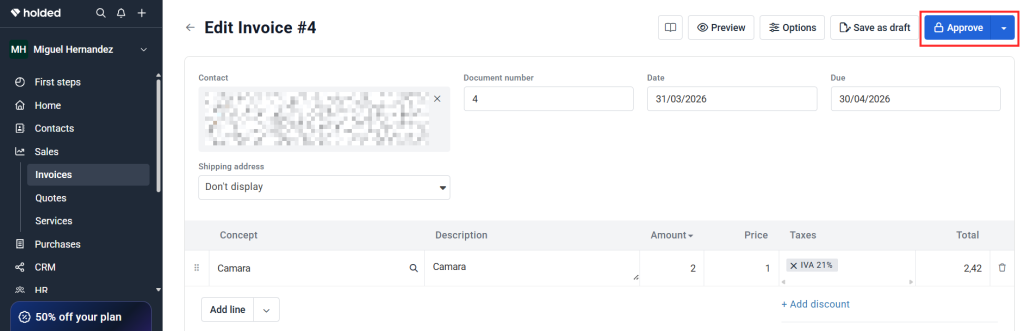
And it’s done! Your invoice generated in Taxolé is now correctly registered, validated, and finalized within Holded.